How to manage Windows using a PlayStation 3 (DualShock 3) Gamepad
How-To One year ago PlayStation 4 was launched. It is likely that many users will already have this video console or the other “Next Gen” video console (Xbox One, Wii U). Because of this, video consoles of the previous generation (PS3) fall into disuse or simply are less played.
Let's see how to take advantage of the PlayStation 3 Gamepads (DualShock 3), and use it to manage the PC (Windows). This way we take advantage of the PS3 wireless controller, which is a device of very high quality and high price, and avoid buying a new wireless device to control the PC. If we are used to handling an actual Gamepad, it will be very intuitive to handle the PC with the gamepad instead of a keyboard and mouse.
The first thing you should keep in mind is that it is necessary to have the following items in order to carry out the instructions of this tutorial.
Hardware:

PlayStation 3 DualShock 3 Controller/Joystick/Gamepad . Important: it has to be the PS3 official controller, can not be another brand.
USB Cable to connect the Controller to the PC.
Bluetooth 2.0+EDR (or higher) Dongle/USB Adapter: This device is optional and will be used to allow the PS3 gamepad to work wirelessly, so there will not be necessary to have it connected to the PC USB port. In our case, we have used the BlueTooth, micro-USB Kensington K33902. At the end of the tutorial, you will find a list of compatible USB Bluetooth adapters with the required drivers.
Software:
Microsoft .NET 4.0 (http://www.microsoft.com/en-us/download/details.aspx?id=17851)
Package of Visual C++ 2013 components (http://www.microsoft.com/es-es/download/details.aspx?id=40784)
Latest DirectX libraries (http://www.microsoft.com/en-us/download/details.aspx?id=35)
Administrator Rights
Program to unzip 7z files. We recommend 7-Zip which is free and is available on 32bit and 64bit versions.
To be able to install the required software, we must know if our Windows Operating System is 32bits or 64bits, so we can use this tool 64bit Checker, that requires no installation, is less than 100Kb, and will inform us quickly if we have a 32bits or 64bits Windows version.
To carry out the process it is necessary to install the Xbox 360 drivers (it is not a typo, for be able to use the PS3 gamepad on PC, we need to install the Xbox 360 Microsoft drivers).
Depends on the operating system that we have installed, we must follow an order in the installation of the drivers Xbox 360 controller:
If we have Windows XP or Vista, we need to install the Xbox 360 drivers after the process of installation of PS3 Gamepad.
If we have Windows 7, we need to install the Xbox 360 drivers before we start with the process of installation of the PlayStation 3 controller.
Windows 8/8.1, it is not necessary to download or install the Xbox 360 drivers.
You can download the Drivers for the Xbox 360 controller from here: http://www.microsoft.com/hardware/en-us/d/xbox-360-controller-for-windows
These are the steps to follow to install the PS3 controller on PC:
*(Only Windows 7) Install Xbox 360 controller drivers
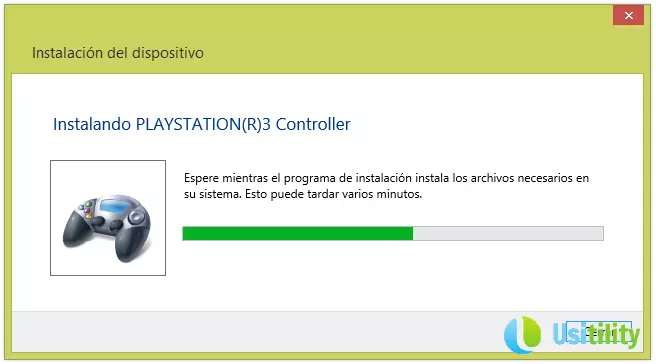
Connect to the PlayStation 3 Gamepad using the USB cable and wait for Windows to recognize and install the appropriate drivers.

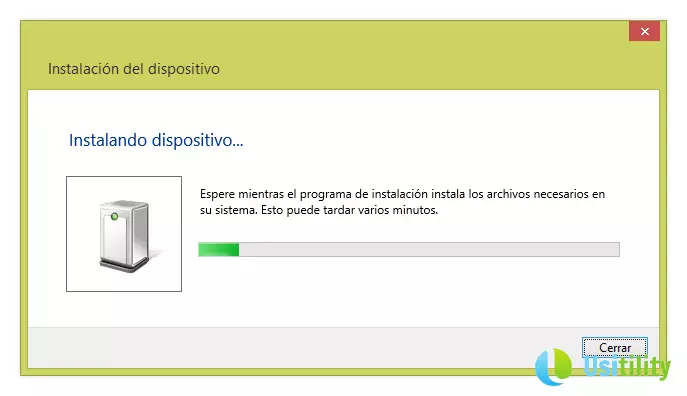
Connect the USB adapter/dongle Bluetooth and wait for Windows to recognize and install the correct drivers .

Download the following files:
Unzip the file SCP-DS-Driver-Package-1.2.0.160.7 z and copy the contents of the folder “ScpServer\bin” to a directory within Program files, e.g.: “c:\Program Files\ ScpDriver\”. It is important that if we create a directory that is located outside of “Program Files”, this directory can't belong to a network drive.
Unzip the SCP-DS-Driver-Package-1.2.2.175-Update.7z file and copy the content of “ScpServer\bin” in the directory created previously, e.g.: “c:\Program Files\ ScpDriver\”. A dialog will appear where we are asked if we want to overwrite the files. We say that Yes to all files, in such a way that that new files overwrites the old ones.
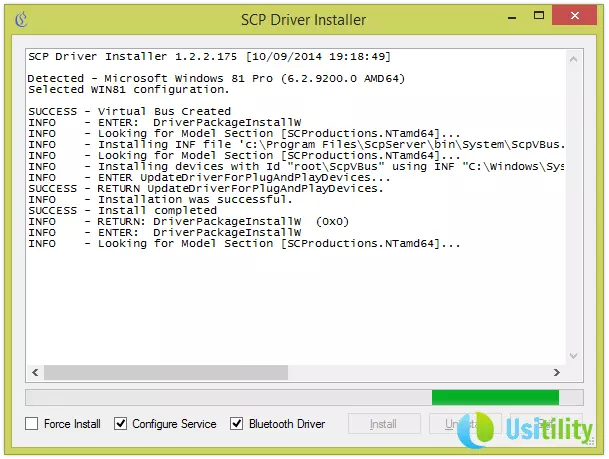
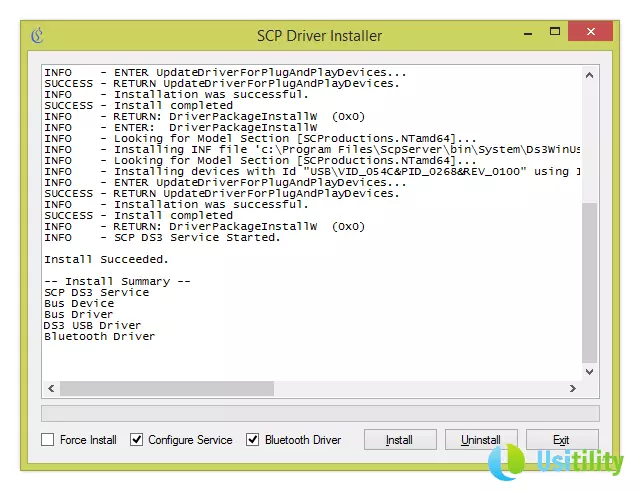
Run ScpDriver.exe

*(Only Windows XP and Windows Vista) Select the option of “Force install”
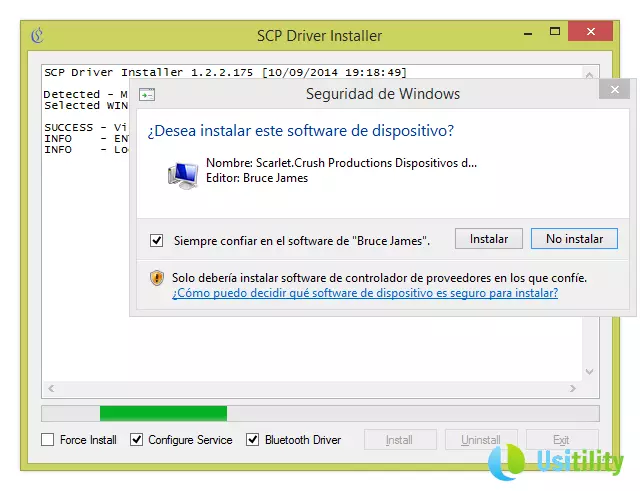
Click “Install”

The driver will be installed

When the installation is complete press “Exit”
*(Only Windows XP and Windows Vista) Install Xbox 360 controller drivers
Not all our PC have all the needed drivers to detect the PS3 controller.
Now connect the controller to your PC using the USB cable that is typically used to recharge the Gamepad.
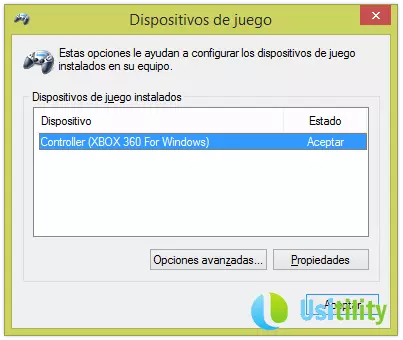
Once connected, press the central button of the controller to turn it on. Windows will recognize the gamepad and it will be ready to be configured and used.
Now disconnect the gamepad from the PC, and reboot the computer.
When Windows finishes booting, with the controller disconnected from the PC, press the central button of the controller, and if all has gone well, will pair with the Bluetooth and it will light the led number 1 in the Gamepad.
If we want to turn off the PS3 controller unpair, we will need to press the combination of buttons: L1 + R1 + PS for 2 seconds.
Note that the USB Bluetooth adapter will only be able to use with the PS3 Controllers and can not be used by another device so that if we were using the USB Bluetooth adapter with a keyboard or mouse, we need to use another USB Bluetooth adapter for the keyboard or mouse.
We will be able to connect up to 4 PlayStation 3 controllers using the same USB Bluetooth adapter.
Once the controller is connected and running, we're going to proceed to configure the buttons on the Gamepad to replace the keyboard and mouse, so that we can use the controller to manage the PC. To do this we will make use of the software JoyToKey.
We must download JoyToKey and unzip it in a folder. This program does not require installation. Run the file JoyToKey.exe and proceed with the configuration of the controller.
If we press any button of the gamepad, we will see how they are marked yellow on the Joystick1 tab inside JoyToKey.

To properly configure the buttons we must double click on the button we want to configure. We are going to set the left analog stick to use it as the mouse of the PC. To do this we must configure the four possible directions of the stick (Up, Right, Down, Left,).
Stick1 corresponds to the left stick and the Stick2 to the right stick. We now proceed to configure the Stick1. Double click in each of the directions of the Stick1, we select “Mouse” at the top, and set the following parameters:
Stick1 Left: Cursor Movement Horizontal: -50
Stick1 Right: Cursor Movement Horizontal: +50
Stick1 Up: Cursor Movement Vertical: +50
Stick1 Down: Cursor Movement Vertical: -50

We can vary the number entered, the higher the number, the faster the cursor will move around the screen.
Now let configure the left and right button of the mouse:
right: We double click on “Button 2”, choose “Mouse” “Button click-> Right”
left Button: We double click on “Button 3”, choose “Mouse” “Button click-> Left”
In this way, we will use the “Square” button for the left click, and the “Circle” button for the right-click of the mouse. You can change these settings for any other that you prefer. The final configuration of the PS3 Gamepad buttons on JoyToKey is the following:
Stick1: Left Stick
Stick2: Right Stick
Button 1: X
Button 2: O
Button 3: Square
Button 4: Triangle
Button 5: L1
Button 6: R1
Button 7: L2
Button 8: R2
Button 9: L3
Button 10: R3

When we have configured the remote to our taste, we must close JoyToKey so the Gamepad will start to work as the mouse of the PC.
In this way, we can control easily the PC using the PlayStation 3 wireless controller. It is certainly a very comfortable control for computers like HTPC (Home Theater Personal Computer), or a PC dedicated to the emulation of old video game consoles.
JoyToKey, in addition, allows us to create profiles, in such a way that if we launch a particular program, for example, XBMC, we can create a new configuration for the buttons on the controller, in such a way that the PS3 controller buttons will have a function when are used to manage Windows and other different functions when we are on XBMC.
List of Dongles/Adapters supported by the PS3 Controller SCP DS3 Drivers:
USB\VID_03F0&PID_231D
USB\VID_045E&PID_3500
USB\VID_0461&PID_4D75
USB\VID_046D&PID_C709
USB\VID_047D&PID_105E
USB\VID_0489&PID_E011
USB\VID_0489&PID_E042
USB\VID_0489&PID_E04E
USB\VID_04CA&PID_3006
USB\VID_050D&PID_016A
USB\VID_05AC&PID_821A
USB\VID_05AC&PID_821F
USB\VID_07D1&PID_F101
USB\VID_0930&PID_0215
USB\VID_0A12&PID_0001
USB\VID_0A5C&PID_200A
USB\VID_0A5C&PID_2101
USB\VID_0A5C&PID_2146
USB\VID_0A5C&PID_2148
USB\VID_0A5C&PID_2150
USB\VID_0A5C&PID_2153
USB\VID_0A5C&PID_217D
USB\VID_0A5C&PID_2198
USB\VID_0A5C&PID_21E1
USB\VID_0A5C&PID_21E8
USB\VID_0B05&PID_1715
USB\VID_0B05&PID_1783
USB\VID_0B05&PID_1785
USB\VID_0B05&PID_179C
USB\VID_0B05&PID_17B5
USB\VID_0B05&PID_B700
USB\VID_0C10&PID_0000
USB\VID_0CF3&PID_3002
USB\VID_0CF3&PID_3004
USB\VID_0CF3&PID_3005
USB\VID_0DB0&PID_3801
USB\VID_0DF6&PID_2200
USB\VID_0E5E&PID_6622
USB\VID_1131&PID_1001
USB\VID_1131&PID_1004
USB\VID_1286&PID_2044&MI_00
USB\VID_13D3&PID_3304
USB\VID_413C&PID_8126
USB\VID_8086&PID_0189
USB\VID_8087&PID_07DA
USB\VID_0930&PID_0214
USB\VID_0A5C&PID_2154
USB\VID_0489&PID_E04D
USB\VID_413C&PID_8197
USB\VID_0A5C&PID_2021
USB\VID_05AC&PID_8286
USB\VID_0A5C&PID_2100
USB\VID_0BDA&PID_8723
USB\VID_044E&PID_3010
USB\VID_0B05&PID_1788
USB\VID_0A5C&PID_2190
USB\VID_13D3&PID_3315
USB\VID_0489&PID_E027
USB\VID_05AC&PID_821D
USB\VID_0BDA&PID_0724
USB\VID_050D&PID_065A
USB\VID_0A5C&PID_21E3
USB\VID_05AC&PID_8216
USB\VID_0A5C&PID_21B4
